
AZ-204 Azure Redis Cache

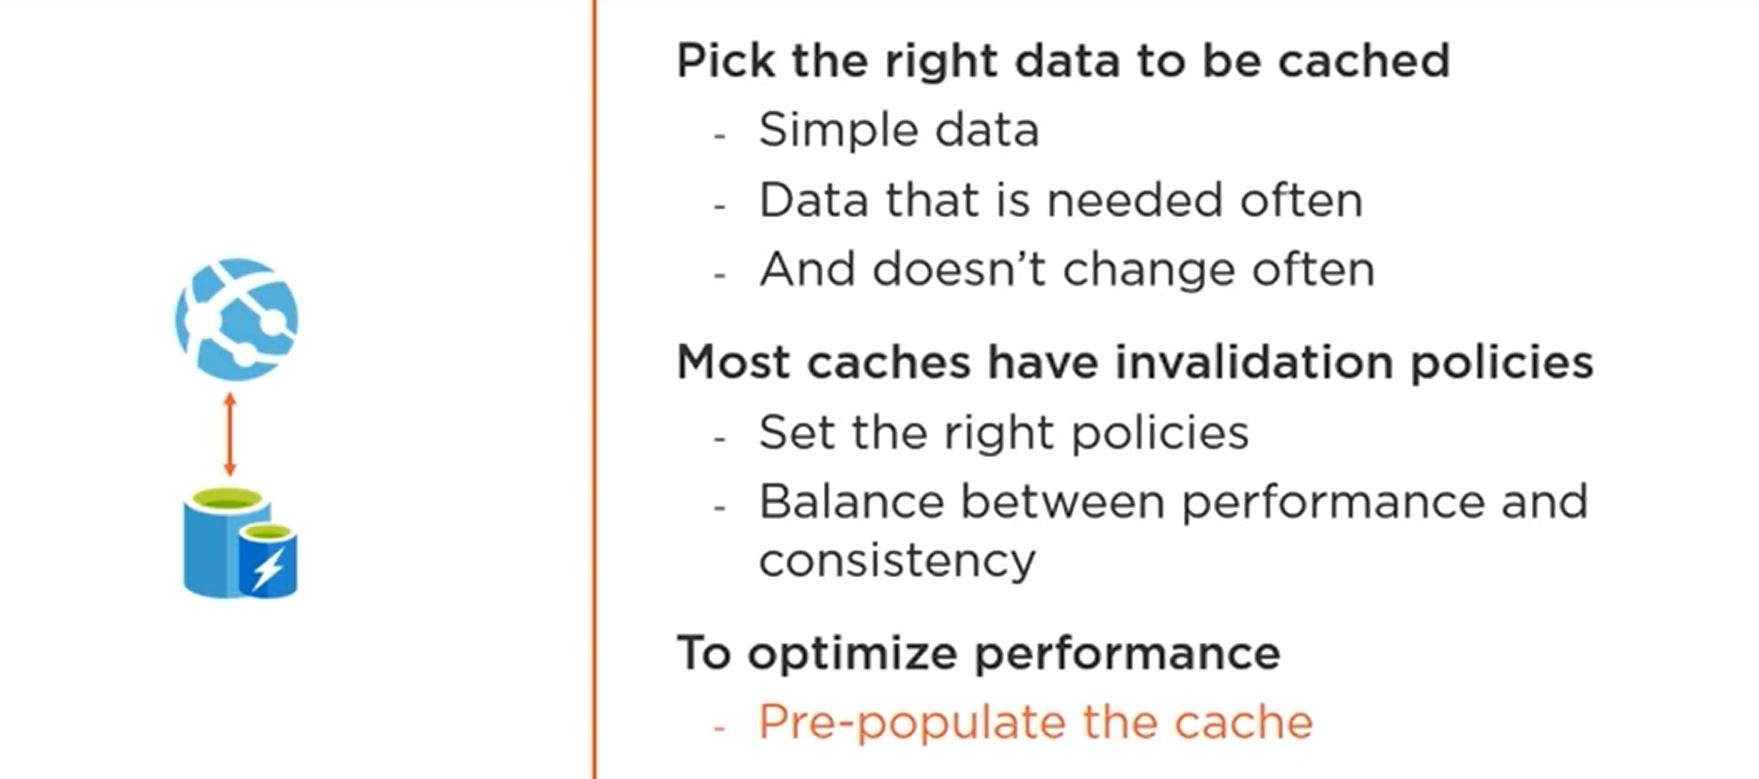
Why should we cache?

1. Because we dont want to hit the database everytime.
2. Caches store data in memory, so its faster to query them.
3. Caches use a key value pair to store data rather than any complex data structure, So the time complexity is less.
4. Also it improves availability, as if the backend in unavailable we can still get the data from the cache. Not all of it but the most frequently used ones. So its important to make sure that we are caching the right data.


Azure Cache

1. Geo Replication: The main copy remains writable whereas the other copies are maintained as readable. So not only is the data available in a new region but also available in case the primary cache is down. In such a scenario the secondary instance becomes writable.


DATA Types


NUGET

Microsoft.Extensions.Caching.StackExchangeRedis -- allows more data types and operations

 services.AddStackExchangeRedisCache(op => {
                op.Configuration = "Connection string from azure redis";
            });


  var data = await distributedCache.GetStringAsync("sales");

                if (!string.IsNullOrEmpty(data)) return  Ok(JsonConvert.DeserializeObject<IEnumerable<Sales>>(data));


                DistributedCacheEntryOptions cacheEntryOptions = new DistributedCacheEntryOptions();
                
                //invalidate or expire the cache after 0 days, 1 minutes and 30 seconds
                //absolute expiring will expire the cache after the specified time
                cacheEntryOptions.SetAbsoluteExpiration(new System.TimeSpan(0, 1, 30));

                //sliding expiration will expire the cache if its not used for the specified time
                cacheEntryOptions.SetSlidingExpiration(new System.TimeSpan(0, 20, 0));

                var result = SalesdbContext.Sales.Take(20).ToList();
                await distributedCache.SetStringAsync("sales", JsonConvert.SerializeObject(result));
                return Ok();


While connecting we might get an issue,


Comments

Popular posts from this blog

Az-500 NSG and ASG

Application security groups Application security groups enable you to configure network security as a natural extension of an application's structure, allowing you to group virtual machines and define network security policies based on those groups. You can reuse your security policy at scale without manual maintenance of explicit IP addresses. The platform handles the complexity of explicit IP addresses and multiple rule sets, allowing you to focus on your business logic. To better understand application security groups, consider the following example: In the previous picture,  NIC1  and  NIC2  are members of the  AsgWeb  application security group.  NIC3  is a member of the  AsgLogic  application security group.  NIC4  is a member of the  AsgDb  application security group. Though each network interface in this example is a member of only one network security group, a network interface can be a member of multiple app...

Azure AD Authentication And Authorization

ROLE BASED AUTHORIZATION Step1:   Setup  API. 1. Create an app registration and create an app role. Make sure that the app role is assigned to user and applications. We add it to both user groups and applications as this role can be then assigned to both users and applications. Scopes can only be assigned to apps. Now we can have only users with this role access our application. This app role behind the scenes adds an approles section to the manifest.json. We can directly add it to the manifest file also. Step 2:  Setup an app registration for the UI/ WEB App. . We will grant this app the read role created in the API app (shown above). Go to Azure AD and select the UI app registration. When we register an application 2 elements get created. 1. App registration  2. Enterprise Application -- service principal that get created for the app Adding roles to applications Go to the App registration => API Persmissions => Add a Permission => My API's The My Api's sec...

ASp.net core 3.1 identity

It is just an extension to cookie authentication. We get a UI, Tables, helper classes, two factor authentication etc. Even EF and its database constructs. So instead of writing code for all of this we can just use these in built features. Extending Default Identity Classes Add a class that inherits from    public class AppUser : IdentityUser     {         public string Behavior { get; set; }     } Also change the user type in login partial.cs under shared folder Then add migrations and update db using migrations. We can customize further.  services.AddDefaultIdentity<AppUser>(options =>              {                 options.SignIn.RequireConfirmedAccount = true;                 options.Password.RequireDigit = false;           ...