
Service Endpoints

We will create a storage account and try to enable service endpoints in it. Such that the storage account can be accessed only inside the specified network. So we create a VNET and restrict access to components inside the VNET.  

1. We create a storage account and create a container and upload an image to the blob container.

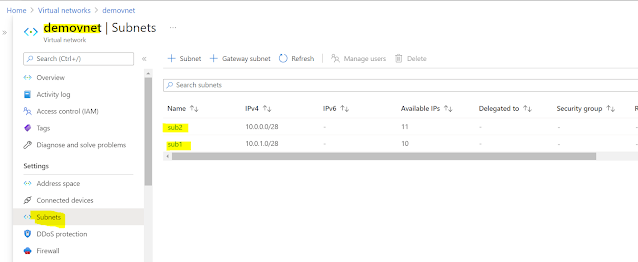
 2. Next we create a VNET and add 2 subnets. 

3. We then enable networking on the storage account by traffic only from the first subnet. 

This will enable service endpoints in the subnet
Note that the second subnet doesnt have a service endpoint configured. So access is specific to a VNET and a subnet inside it (not to all subnets in it).
4. Then we try to view the uploaded blob in the browser (wont work). 
5. Then we create a VM and then add it to the subnet that has access to the storage account..
 6. Inside the VM if we try to access the same blob we find that we are able to view the image.
7. The same storage account cannot be accessed from the azure portal as well if the IP has not been added in the firewall configuration. 

To view the storage account content add the IP from the networking tab for the storage account


Comments

Popular posts from this blog

Az-500 NSG and ASG

Application security groups Application security groups enable you to configure network security as a natural extension of an application's structure, allowing you to group virtual machines and define network security policies based on those groups. You can reuse your security policy at scale without manual maintenance of explicit IP addresses. The platform handles the complexity of explicit IP addresses and multiple rule sets, allowing you to focus on your business logic. To better understand application security groups, consider the following example: In the previous picture,  NIC1  and  NIC2  are members of the  AsgWeb  application security group.  NIC3  is a member of the  AsgLogic  application security group.  NIC4  is a member of the  AsgDb  application security group. Though each network interface in this example is a member of only one network security group, a network interface can be a member of multiple app...

Azure AD Authentication And Authorization

ROLE BASED AUTHORIZATION Step1:   Setup  API. 1. Create an app registration and create an app role. Make sure that the app role is assigned to user and applications. We add it to both user groups and applications as this role can be then assigned to both users and applications. Scopes can only be assigned to apps. Now we can have only users with this role access our application. This app role behind the scenes adds an approles section to the manifest.json. We can directly add it to the manifest file also. Step 2:  Setup an app registration for the UI/ WEB App. . We will grant this app the read role created in the API app (shown above). Go to Azure AD and select the UI app registration. When we register an application 2 elements get created. 1. App registration  2. Enterprise Application -- service principal that get created for the app Adding roles to applications Go to the App registration => API Persmissions => Add a Permission => My API's The My Api's sec...

ASp.net core 3.1 identity

It is just an extension to cookie authentication. We get a UI, Tables, helper classes, two factor authentication etc. Even EF and its database constructs. So instead of writing code for all of this we can just use these in built features. Extending Default Identity Classes Add a class that inherits from    public class AppUser : IdentityUser     {         public string Behavior { get; set; }     } Also change the user type in login partial.cs under shared folder Then add migrations and update db using migrations. We can customize further.  services.AddDefaultIdentity<AppUser>(options =>              {                 options.SignIn.RequireConfirmedAccount = true;                 options.Password.RequireDigit = false;           ...